Build Gallery
Feel free to browse through the gallery images below or check out the latest on Facebook and Instagram.
To ginfinity and beyond
Below you can find a selection of photos that show the humble beginings of the horsebox and how it was transformed into a mobile bar. There are also a few shots from some events it has attended.
Pretty much every part of this build has been bespoke, there are no plans to work from and I've had to think ahead about most things as the build has progressed. Some of it has been fun, other bits frustrating, but it all came together in the end, although I suspect I will tweak and improve it as we use it more.
This gallery is constantly expanding as we provide our services to more parties and festivals, so please come back and check on our progress.
If you have any photos of the ginfinity bar and are happy to have them displayed here then please email them to:
email@ginfinity.biz
UPDATE: At the end of August 2022 we took the decision to do another rebuild of the chassis because the old suspension units were starting to fail and we didn't want to tow anything dangerous around. So another 2 months of dismantling, cutting and welding allowed us to put a complete new chassis, with 4 new suspension units and a new tow hitch all mounted on new metal. I suspect it's now stronger and brakes better than when it was first built. It was back on the road again for a couple of Christmas events.
The starting point
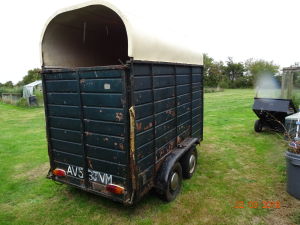
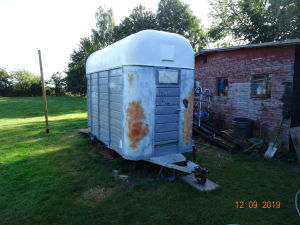
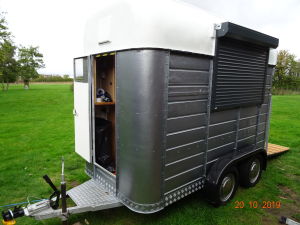
This is the horse box we bought blind off of ebay. It was a good price but boy was there a lot of rust. Note to self, buy a better shell if I build another one, it'll save a lot of time.
The chassis was badly rusted and the only thing holding it together was the 3 layers of floor boards, but even those had started to rot. I treated the chassis with a rust remedy solution before welding a complete new chassis in place to give it all it's strength back.
The roof was mostly ok, no major cracks and just a few repairs at the back that needed new glass fibre. The worst bit was the rear frame that's inside the roof had rusted completely through. Rather than try to repair this (welding and glass fibre don't mix well) I put a new 25mm box frame in and bolted this in place.
Start of the first build
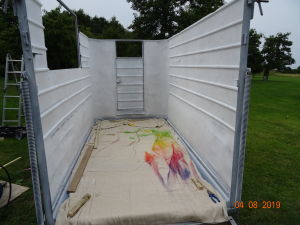
Here's a snapshot of the initial build to get it ready for a big party in the garden in August.
I added some additional angle iron to support the floor, put down a double layer of thick damp proof plastic membrane and laid the new floor on top for which I used 18mm external plywood with a couple of coats of yacht varnish on it.
The walls were just sprayed white to tidy them up.
Bar in action
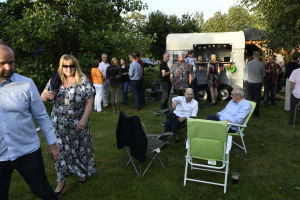
A shot of the bar in action during our August party, we were very lucky with the weather, but we did have 4 marquees up just in case.
Before the second build
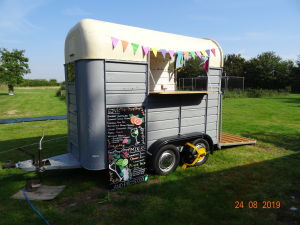
A shot taken after the party but before the interior was stripped so it could be improved.
The exterior grey paint was a cheap £10 tin of interior bathroom paint just done for the party as I was running out of time to do a proper job. It's amazing how well that paint stood up ... but I didn't plan to leave it as the finishing look.
Interior
Another shot before the strip down and you can see in this photo that although the walls are white, there is no insulation in them. This is the same for the roof and just to make it look a bit nicer for the party I simply covered it in thick lining paper. The lining paper in hindsight was a mistake and I wouldn't do that again because lots of it didn't stick and what did stick wouldn't them come off again. It didn't actually matter in the end as I covered the whole ceiling during the second build.
Lots of filler
Here's photo that shows how badly dented the front of the box was. This is not through misuse, it's more a case that this is where you tend to push the box when moving it around and the galvanised steel isn't strong enough to support that. Anyway, lots of glass fibre filler has made it a lot better plus I've added some extra metal inside to help add more strength so hopefully we won't pop the filler out if we push on the front to manoeuvre the box.
Interior improvements
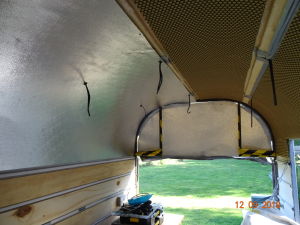
Here's a shot of the interior part way through the second rebuild. Initially the roof interior was just papered over which turned out to be not such a good idea, Here I have added some insulation which is actually an unused pool cover and is essentially very heavy duty bubble wrap. You can see this on one side and the final aluminium sheeting on the other, all held in with oak beams that the LED lights are attached to.
Whoops no brakes
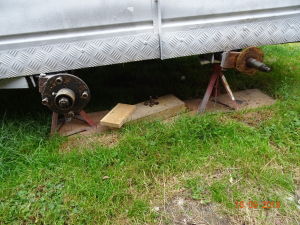
When I tried to check the drum brakes the screws were seized and had to be drilled out (yes I tried WD40, heat, an impact driver etc). It turned out that was the easy bit as whole brake assembly fell out when I did manage to remove the drum. After talking with and visiting a nice chap who knew everything about trailers and horse boxes I discovered the horse box was older than me and the brake spares hadn't been made for 20 years. After looking at options and cost he managed to source a set of new back plates, shoes and the internals for a new set.
They're fitted now but they are driven by metal rods rather than cables, so the next job is to run new imperial UNF rod front to back and to each wheel.
The interior is coming together
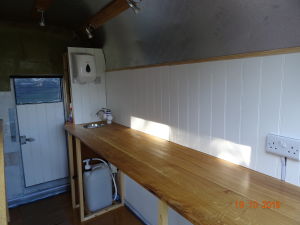
Here's a shot from the back showing some of the internal decor. I'll probably put some shelving up at some point, but there are bigger jobs to do before that.
You can probably make out the tap and sink at the far end with the paper towel dispenser above it. The tap is fed from a 25L water bottler via a flojet pump which although is designed to feed coffee machines, works really well as a water feed to the tap. The tap has a heating element built into it, so it heats the water as you use it ... a really neat little thing, I just have the waste outlet to sort and that'll all be finished.
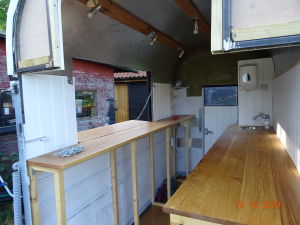
The interior view from the back
There's more finishing to be done around the hatch to cover some of the rough edges. Also I need to build a cupboard at the far end to mirror the one on the right.
There's actually quite a lot of space inside that can be turned into storage, at the moment we're not sure how much we'll need.
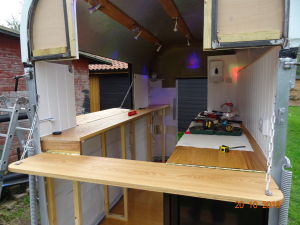
The rear bar is now added
You can see here that a rear bar has now been added so that we can serve from 2 parts of the wagon. It will be interesting to find out if this makes any different to how cold it gets in the winter.
The gap under the bar will eventually be clad and have a door, this should stop through drafts.
Let there be light
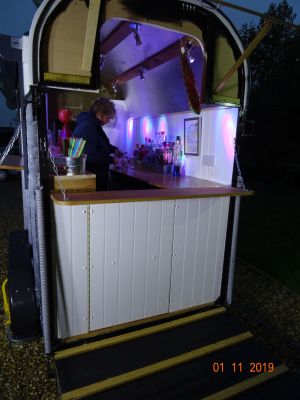
OK in truth I've had the electrics and lighting working since August but this shot was taken after all the electrics were tested by a qualified electrician who passed the work as safe, so the bar is now certificated.
I will take a better photo when it's dark so you can see the lighting in all it's glory. There are 3 banks of 3 led lights which can be switched on separately. Currently the led bulbs are multi coloured and can be set to strobe or flash.
You can also see that the triple bottle cooler and freezer are back in place as it's now less than 2 weeks before the first real hard test at a proper event.
It's all gone dark
Finally the main hatch cover is installed, there are still a couple of gremlins with it but I can live with them. After an initial disaster of managing to break all the clips that hold the shutter to the main rail, I've replaced them and it's all good now. This is a motorised shutter with a little key fob remote.
Ready to use
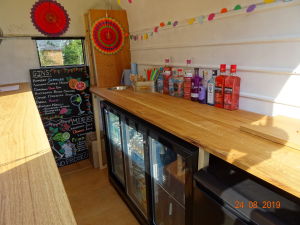
The Bar is now ready enough that it can be used. There is still a bit of work to be done at the back and I need to order some gas struts for the rear hatch. I also need to respray the wooden rear hatch with white paint to match to roof.
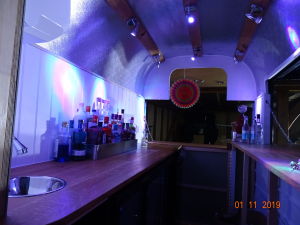
You can see the lighting here and we can choose the colour and effect of each light.
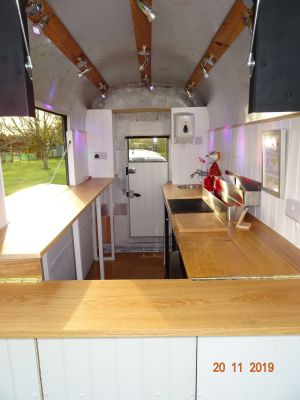
Shot from the front to the rear
This picture again shows off some of the lighting and features now that the interior is nearly finished.
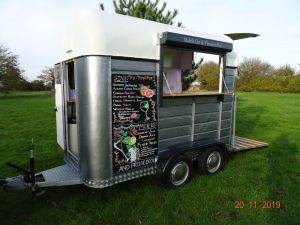
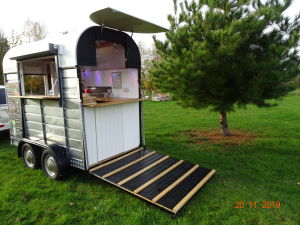
One of Seven - in the garden
Having got to a good point in the build of the bar, I took the wagon into the garden to do a photo shoot.
As you can see, ginfinity has now had the sign writing added thanks to D-Signs of Stowmarket.
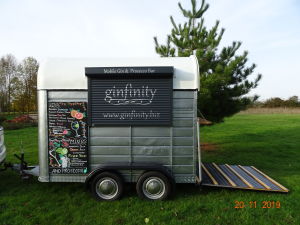
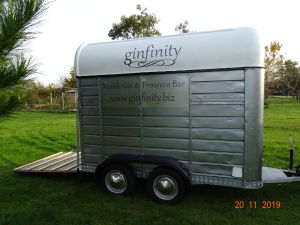
Two of Seven - the front with the shutter down
This picture shows off the sign writing on the side which is a good advert whilst the bar is being towed.
One thing I have noticed is that when is use with the shutter up and the rear bar in use, there is nothing advertising the ginfinity name ot the fact it is for hire ... this is something that need to be fixed.
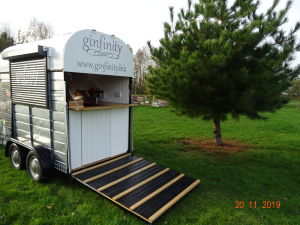
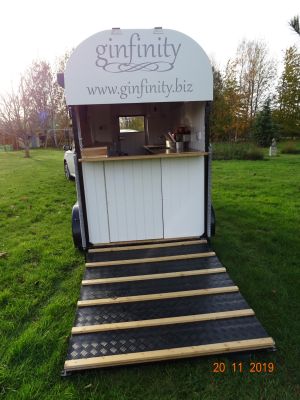
Three of seven - the rear hatch
You can see here the logo and website on the back. Unfortuantely this disappears as soon as the hatch it raised.
I now have a large white panel to replace the one you can see below the rear bar which will have all the advertising on it as well.
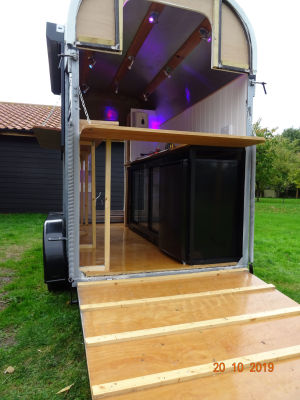
Five of seven - ready for business
Both hatches are open and both bars are extended in this photo. The blackboard above the bar is ow visible and this will be used to advertise.
Six of seven - Interior almost done
There is still more work to do on the interior but it is good enough to use now.
The upper cupboards at the far end of the photo will have doors and shelves added. Another cupboard will be added higher up covering the whole end above the door which will tidy up the interior quite a bit.
